Tutorials UE2 Zoning/Occlusion
About : Explains how to improve the framerate using occluders and zones.
Target Audience : Everyone
Platform : Unreal Engine 2
Last Update : August 2006
Introduction
A lot of engines out there always render everything in range, unrelated to what the player really sees. A common beginners misconception is to assume that if one can’t see an object on your screen it isn’t there. It’s essential to understand that a game engine looks at things differently than you. While you might only see room A,.the engine might also see and render rooms B and C. An area can be slowed down by something only the engine can see. Sometimes it is necessary to help the engine and force it to forget certain areas.
Zones and occluders are the two most powerful options one has to optimize something in the Unreal Engine, in particular in Engine 2.
Zones divide the level into different sections using a BSP shell. Any zone (and anything that is inside it) that you can’t see will be hidden..
Occluders (or also called anti portals) hide everything behind them. They are large surfaces that can be added into walls and floors to force the engine to forget what’s behind it..
Occluders
Occluders can often hide meshes only if those meshes are completely behind the occluder. If a single vertex sticks out and comes within viewing range it will render the entire mesh. Very large meshes will therefore almost never be hidden. If you have a large and high poly mesh you should therefore cut it up into multiple pieces so the engine does not need to draw the entire large mesh and all its triangles all the time.
Smaller meshes are easier to hide. That is especially true for buildings and other tall geometry. Buildings often have a lot of detail on ground level and at the same time they are often also tall. The taller something is the more likely it is always in view and thus the more likely it will be rendered. Cutting up a building in half (a low poly upper half and a complex high poly lower half) allows the engine to only draw exactly what it needs.
That is also very true for small details. A lot of artists often attach small details to bigger meshes such as doors and windows attached to a house mesh. Because the house is rather big it is likely going to be rendered almost all the time and because the detail is attached to it, it will force the engine to always render all the detail as well even though one might not see any of the detail as only the roof or its chimney may be visible in the distance. By splitting it in multiple meshes you can make life easier for the engine.
A lot of people make the mistake of adding very small occluders. As explained a mesh can’t be hidden unless it is lies completely behind an occluder. Thus a small occluder has less chance to hide something than a big one.
Create very large ones and add them in hills, walls or big buildings.
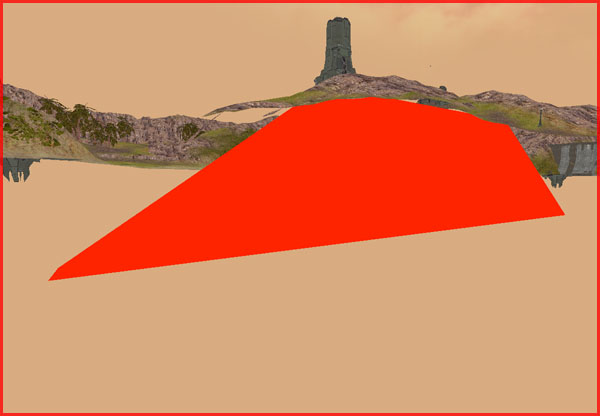
Occluders can slow down the PC too so use them wisely. A few large occluders should be sufficient for most environments. If there are too many occluders the game might actually slow down because the engine has more work trying to figure what it can’t see than if it would just render everything. If there are too many occluders there will be too many “what can’t I see?” calculations. The amount of occluders depend on the engine and the platform but I personally wouldn’t want to have twenty occluders in view (in view does not mean in the entire level)
Another common mistake is to place useless occluders. If an area is empty or low poly it likely doesn’t require an occluder. An example of that are the edges of a level. Placing occluders on the edge of a level is bad.
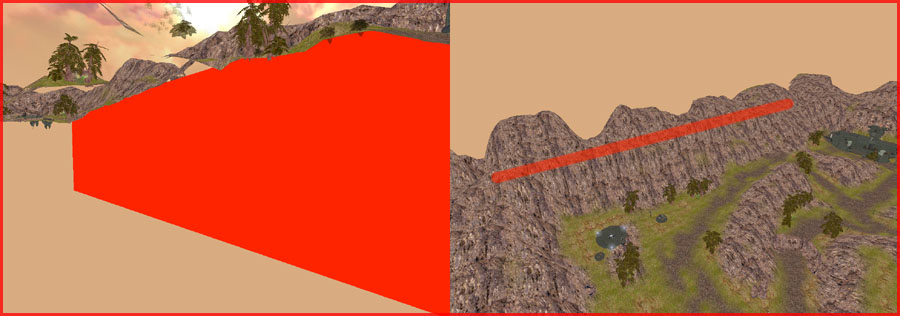
There is nothing behind the edge of a level, what would an occluder hide if there is nothing out there? The engine has to perform extra work because of the occluder while it gains nothing or very little by investing its power.
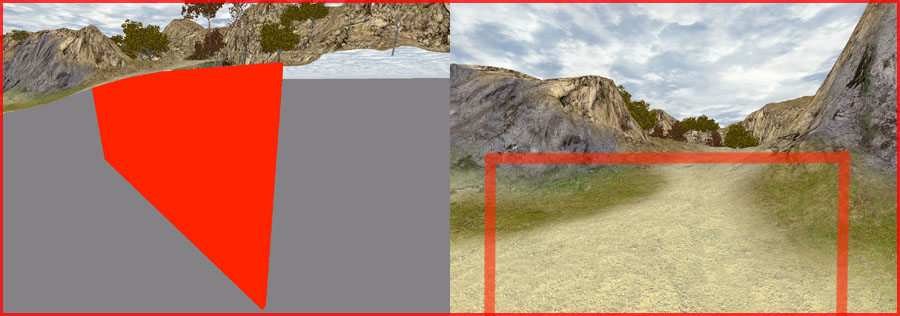
Occluders are not only meant for walls, they can also be added in the floors or ceilings of an area. A cave would be an example of that. You obviously don’t want to see the landscape above the cave so a large occluder that covers the entire ceiling is likely a good idea. Another example is a plateau. While often forgotten a plateau can also contain an occluder. Following picture will show you so.
Zoning
Zoning only works when you can only see a bit or preferably nothing at all of the next zone. A lot of people wrongly implement that rule. An example of that are these two rooms connect by a small corridor.
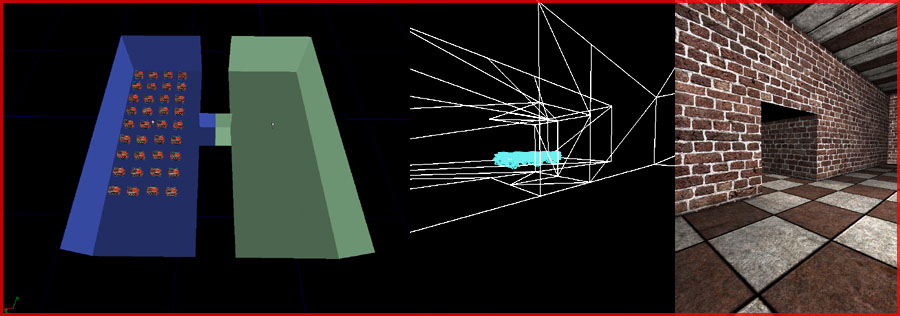
The rooms are separated by a single zone portal. If there would be only one portal it would still render quite a lot of the next room as you can see on the wireframe picture. Rendering a room you can’t see is a waste of FPS. The reason why it renders the second room is because the zone portal was still visible from your position. If however there would be a third small zone in the corridor it will act as a buffer zone.
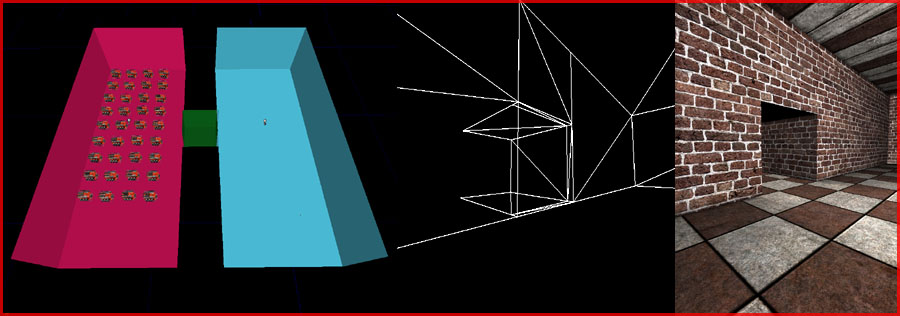
The two rooms are separated by a third little zone in the middle which makes a great difference as you notice on the wireframe picture in the middle. One can view into the third little zone but not in the big red one and therefore it is not rendered.
Even better is to extend the corridor a little and create a Z or L shaped corridor which is obviously more efficient than their straight counterparts. There is less chance someone will be able to look in to the next room like this.
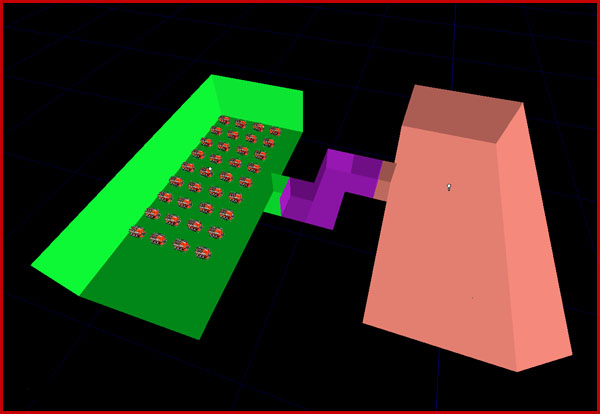
A lot of people try to zone outdoor areas while they should not. In outdoor situations you typically make the entire outdoor area zone A and the indoor areas zones B, C, D and so on. You do not zone outdoor areas! You can’t. Following picture explains why.
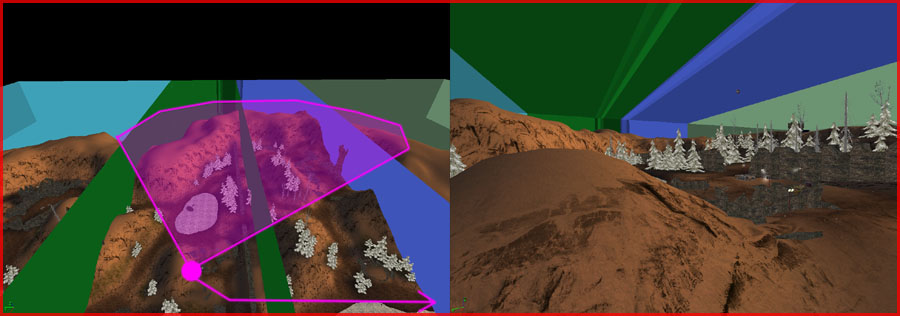
Placing huge zone portals across the land is useless because you can always see into the other zones and since the other zones are visible they will have to be drawn and thus there won’t be any difference with the unzoned version. It could be slower even, especially in Unreal Engine 1. The huge zone portals cuts through all the BSP geometry and therefore creates a lot of new BSP cuts and thus polygons. The more BSP geometry you have and the bigger the portal the higher your BSP polycount will rise.
There is one type of outdoor that is an exception to that . A canyon/downtown city environment. AS FallenCity is a good example of that.
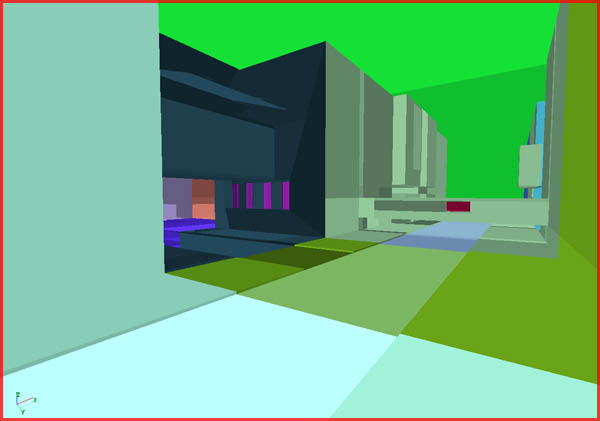
The high buildings and the few straight pieces of road allowed this level to be zoned. You can’t see the next zone because of the tall buildings.
Because the majority of games use nothing more than meshes zoning appears to become less and less popular lately while there is little reason for it.
If your engine supports BSP you can easily use it create a BSP shell around the meshes and then zone the shell. On the following picture you can see mesh cave surrounded by a zoned BSP shell
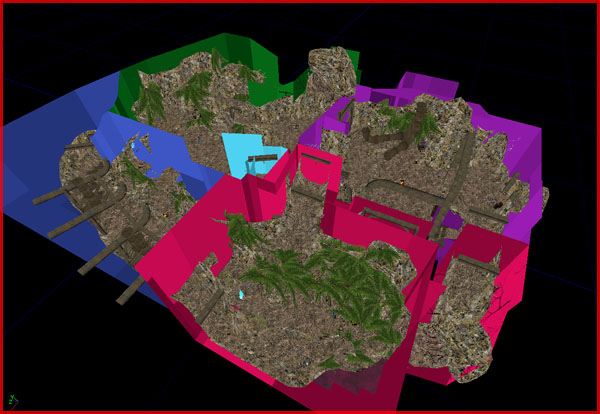
Because of the shell the level can still be divided into zones without any visual difference.
Zoning is more efficient than an occluder. Therefore I prefer creating BSP shells around mesh sections than to solely rely on a couple of occluders.
Zoning, Occluders and the Unreal Engine
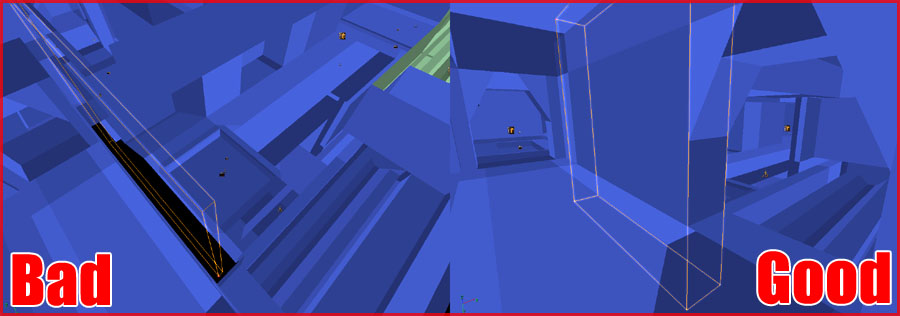
The right picture is better than the left picture. The occluder in the right picture touches subtracted space, the left occluder does not and is positioned completely in the void. The theory behind this is that objects in another zone will be hidden if you can’t see them. The void itself is a type of zone. If the occluder is positioned completely in the void it will not be rendered ( in the right conditions it can still be rendered though) because it is not in the player’s zone nor any visible zone. If the occluder would be touching the subtracted space (and thus the zone the player is in) however it will be rendered.
A variation on that situation is when you have two or more zone portals near an area with an occluder like in this picture
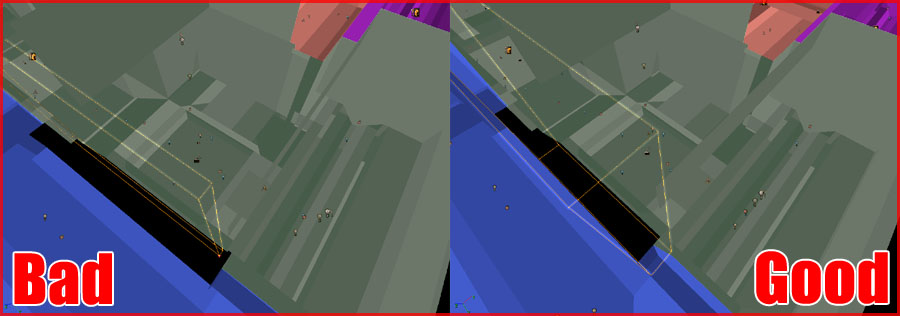
Again the right is better than the left example. The right occluder touches the subtracted space of both zones. The left one does not. Since there are two different zones around the occluder it needs to touch all two zones or it might still not be rendered if the player is in the blue zone.


